

I’ve been wanting one of those wall-mounted electric fireplaces for a while now and with Winter and the holidays right around the corner, it seemed like the perfect time to build my faux fireplace. This wall in my living room has pretty much been empty for years so it was about time for a change.

I’ve seen mantel walls made from pallet wood that look really awesome but I didn’t have any pallets. I did have some old, chippy, white fence boards I had saved from a fence I took down in my yard. I thought it would give my mantel wall a great rustic look. I also had a few barn boards that I wanted to make into the mantel shelf and a decorative antique window to hang above it all for a unique twist!
I started by measuring the length of the wall and marking the middle with a piece of painters tape. I measured out where I thought the studs should be and used tape to mark those too. After determining how wide I wanted my mantel to be, I started cutting the fence boards and mounting them on the wall.
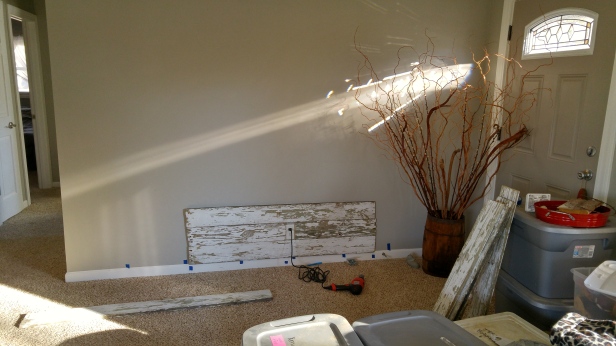 After I had put a few boards up I realized I wasn’t hitting any studs. I researched a little bit and learned that instead of measuring for studs from the corner of an inside wall, I should have measured from the outside wall. There was also an electrical outlet on the wall and I knew that would be mounted to the side of a stud. Once I figured out which side, I measured out 16″ on each side of that and then had to re-attach the fence boards. I also made the mistake of buying screws that were too short and had to go back to the store two more times to get the right length. Ugh! I touched up the heads of the screws with some flat, grey paint to eliminate the shiny metal look.

I thought about placing some vertical fence boards around the whole thing to frame it but I kind of liked the exposed rough edge of the boards (and I was really over the whole board cutting ordeal). I made sure that the natural edge was on the left side which can be seen easily and the new, cut edge was on the right, which won’t be nearly as visible from anywhere in the room.
I used two old barn boards I had on my woodpile and some cast iron brackets I picked up at Hobby Lobby to make my mantel shelf. There wasn’t anyone around that day to help me put the mantel shelf up so I used two “prop” boards that I wedged underneath, to hold it up. I used a level to make sure it was straight before I drilled pilot holes through the barn wood, the fence boards, the drywall, and into the studs. I used some 3″ long screws to attach the shelf. I hung my antique window at the top.
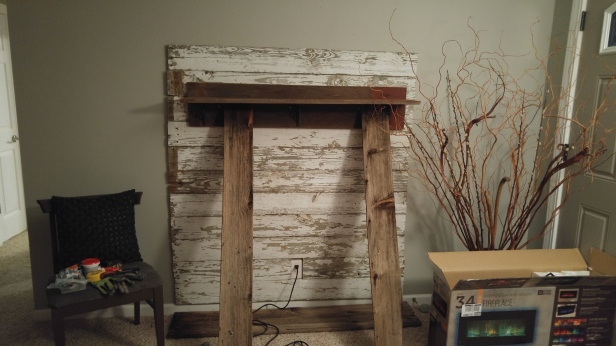 I purchased the electric fireplace at Menards. There is an option to blow out heat or you can just have the realistic flickering fire with log inserts or optional river rock or sea glass inserts, depending on the look you want. It comes with a remote and several options for color, flame height, and back-lighting. It came with a mounting bracket which is how I intended to place it on the mantel wall. Unfortunately, I figured out at this point in the project that I couldn’t hang it on the wall because the fireplace needed to be mounted to two studs. If I had known that before I started the project I could have shifted the mantel to the left a little bit but as it was now, the fireplace would not have been centered correctly on the mantel. Fortunately, it also comes with two feet you can screw on to the bottom so you can just place it on the floor. Gonna have to be good enough because I’m not moving all those boards! I found a few extra barn boards on my woodpile and built a little base on the floor in front of the mantel to raise the fireplace up a little higher.

It sure has given the living room a cozy glow just in time for the snow to start falling outside.
 Now all I need to do is grab a cup of hot chocolate and relax in front of my fireplace with a good Christmas movie!

Love it!!! You are an awesome handy-woman👍
LikeLike
Wow, very creative! I am inspired to try something like this myself now!
LikeLike